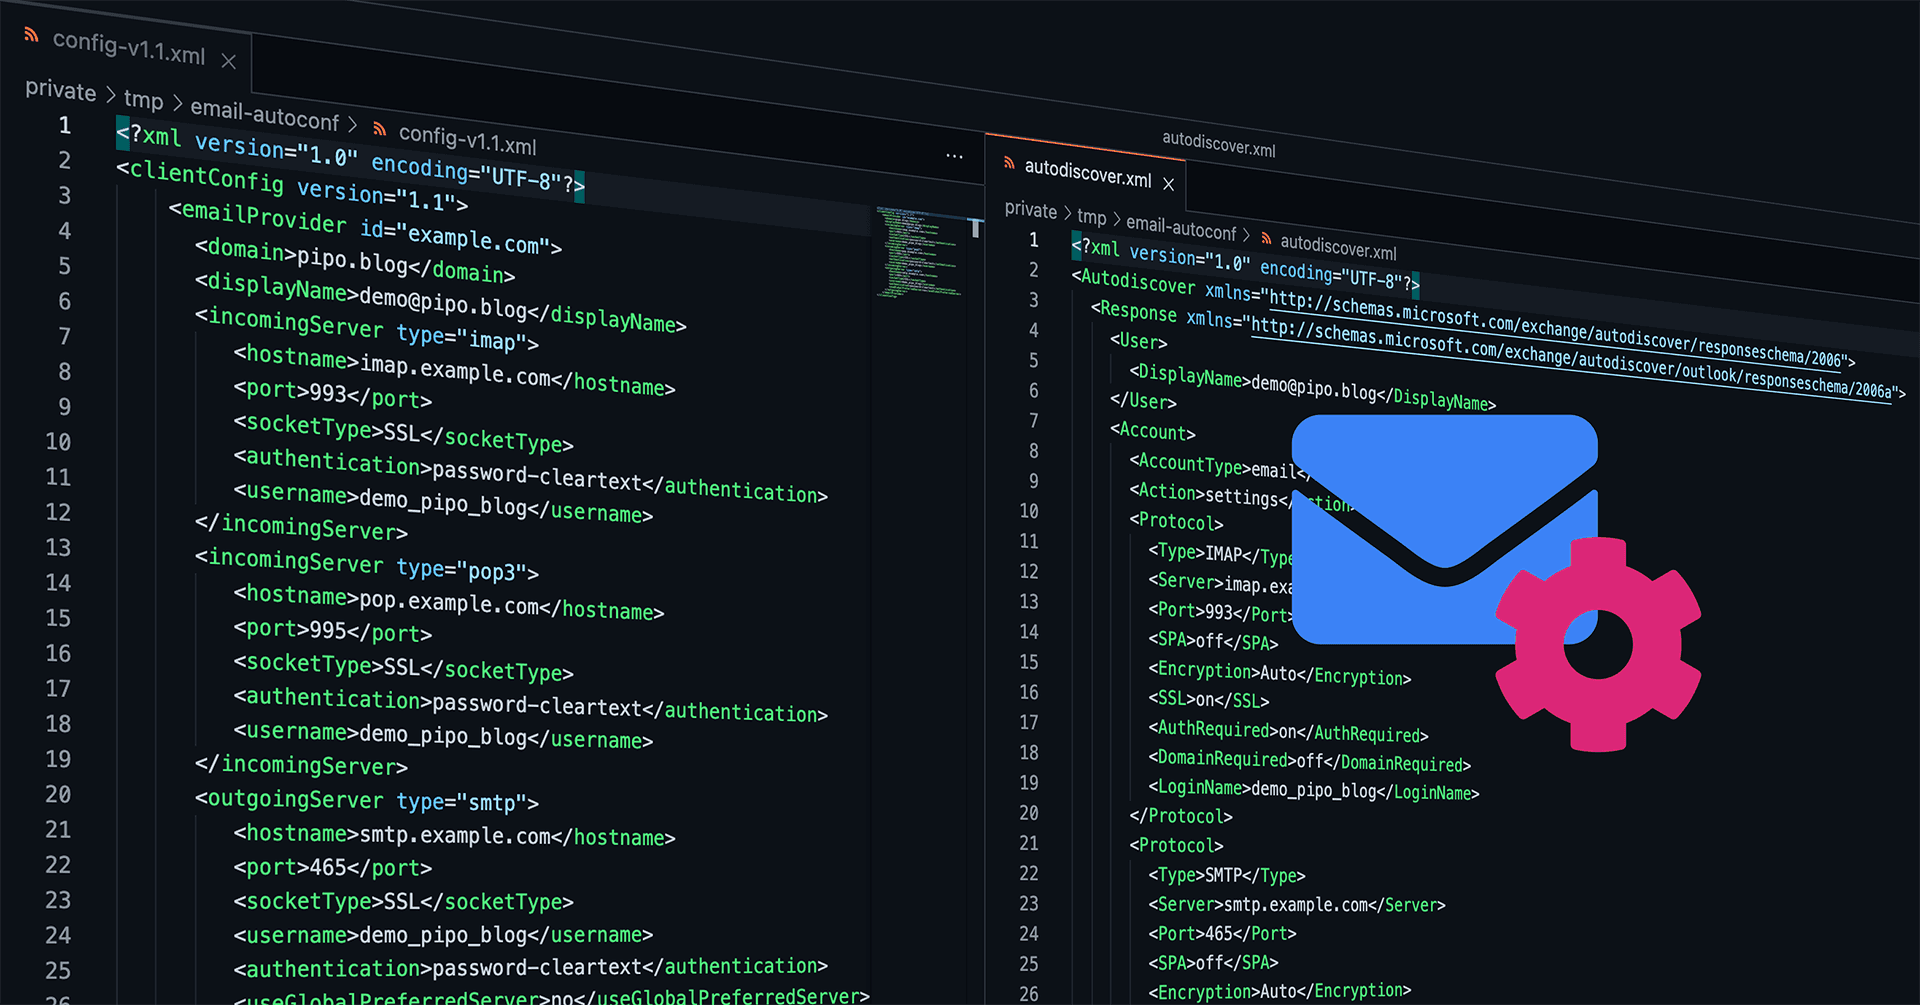
Automated Mail Client Configuration with email-autoconf
How nice would it be, if every email client could be auto-configured and the user would just need to enter his credentials? Entering his email address plus password, hit enter, done. How come nowadays people still need to care about incoming IMAP and outgoing SMTP servers, encryption (SSL/TLS vs. STARTTLS protocols), ports (for a regular end user this is just a number without any meaning, right?), and maybe even wondering what was the username if that differs from the actual email address?
You may tell me: Hey, we're in 2021, email is so old-school! Or you may tell me: Oh, don't you know there is a thing called auto-configuration? – Unfortunately, both statements are wrong. Email today is still widely used for serious communication (and yes, you're right, it should have been replaced long time ago by something better! But it didn't.), and there is such a thing called auto-configuration, but there is just no real standardized protocol that works for every mail client out there. There was no real development in that field during the last 10+ years, sadly.
So, let me present that small Python project Martin and I have been developing for Onlime GmbH back in Feb 2020 and which I have now finally published on GitLab.com: onlime/email-autoconf
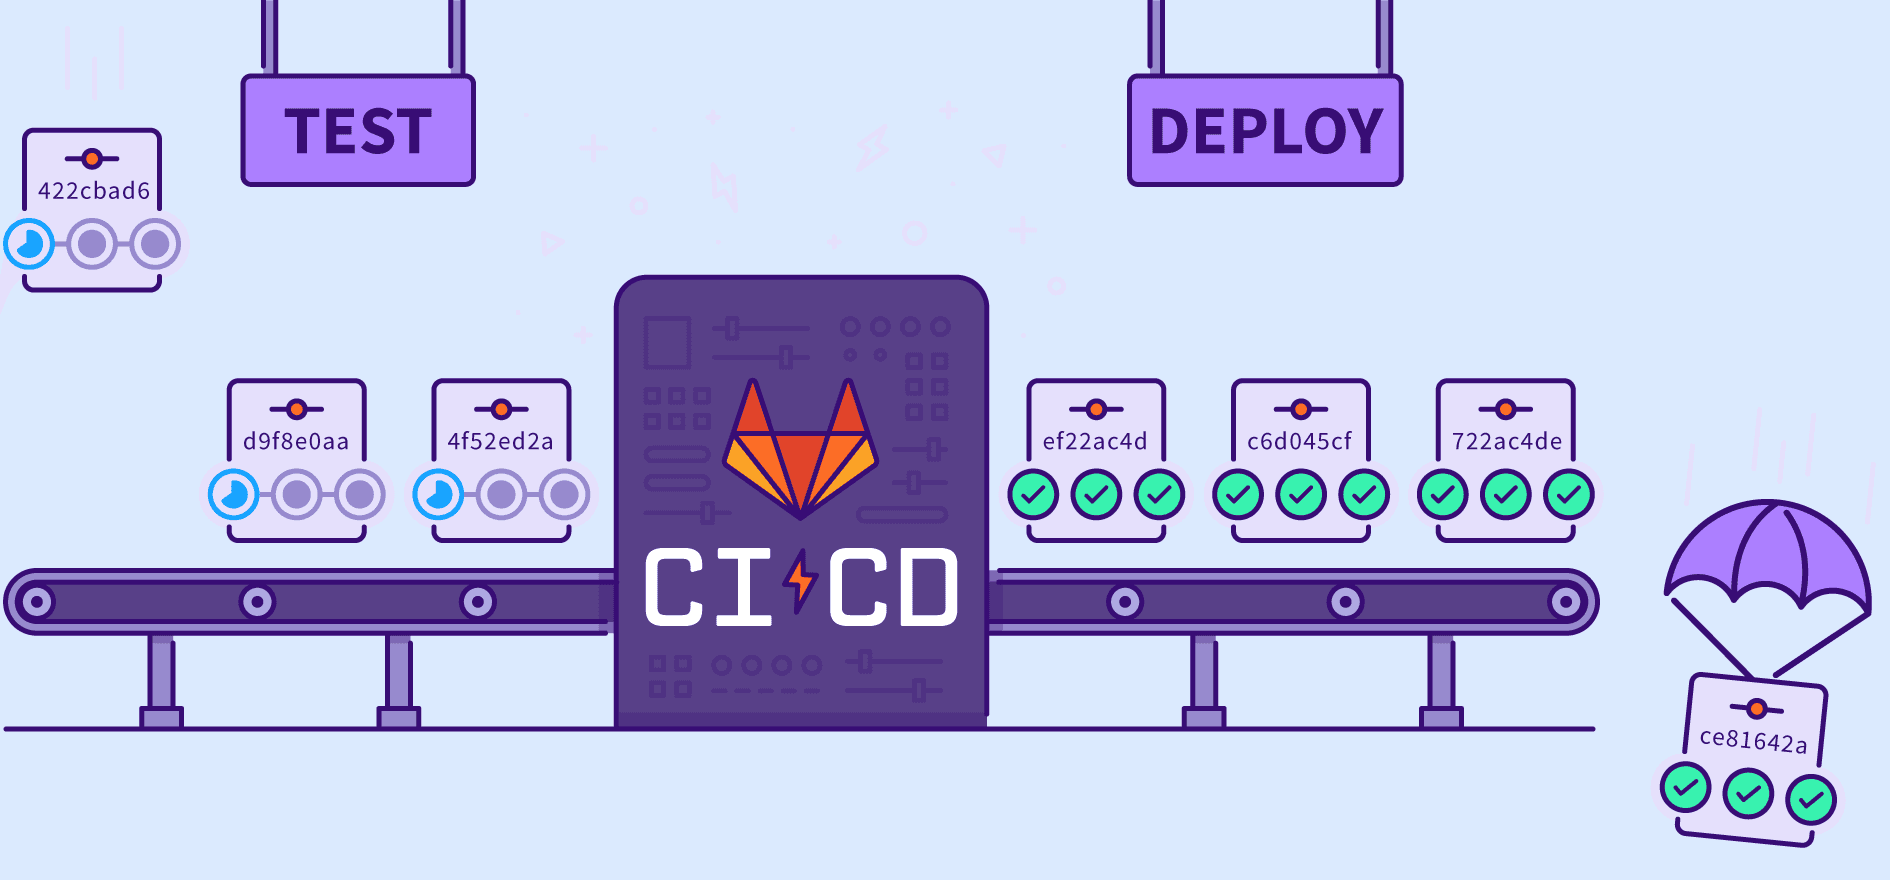
GitLab CI/CD of a Nuxt.js frontend over SSH/rsync
Continuous deployment is great and a must for every modern web app. Forget about the times when you had to constantly log into your production server over SSH to run some git pull based deployment and cumbersome and error-prone build tasks, or building your project locally and then deploying it with rsync to production, which is not that sexy either. It is all doable and scriptable, but we want to have the whole process automated without any manual work involved. I much prefer to use GitLab CI/CD over GitHub Actions - ok, mainly just because I am more into it and prefer to run a self-hosted GitLab instance. GitLab just gets the job done very well!
We want the whole process to be straightforward without any fancy extras. It should be a matter of 15mins to set it up on every new project and I don't like to introduce any extra dependencies. I am just talking about deployment of a static site / SPA, a Vue.js based frontend that is generated by Nuxt.js. So let's keep it simple here! I am going to present you the solution I am using to deploy this TechBlog.

Cleanup helper script to destroy old ZFS snapshots
For years now, I am using this little helper script written in Python, which solves a very basic task: Destroy legacy ZFS snapshots. We all know ZFS snapshots are so lightweight and we tend to create so many snapshots, either manually (e.g. before a major system upgrade) or automated (e.g. by our replication or backup jobs). It can somtimes be cumbersome to destroy legacy ZFS snapshots that are no longer needed.
So, here comes help with zfs-destroy-snapshots.py which you could deploy to /usr/local/sbin to have that handy script ready. I know, this is like a really small snipped I could just post to Github Gist (ok, here you go: onlime/zfs-destroy-snapshots.py) or Pastebin, but I think it still deserves a full blown blog post.

Configure ESLint and Prettier for Vue/Nuxt.js project in VS Code
I'd like to share my recommended ESLint and Prettier configuration for a Vue.js project built with Nuxt.js (loving it!). As preferred IDE, I am using - guess what? - VS Code. This article is just considered as simple dev notes without digging any deeper, and it's based on my current "best practices".
Install ESLint and Prettier with all recommended plugins into devDependencies using yarn (you might as well use npm):
$ yarn add --dev eslint eslint-plugin-nuxt eslint-plugin-vue
$ yarn add --dev eslint-config-prettier prettier eslint-plugin-prettier
$ yarn add --dev @nuxtjs/eslint-module @nuxtjs/eslint-config @babel/eslint-parser
Restrict commands by SSH authorized_keys command option
SSH authorized_keys allows you to define a command which is executed upon authentication with a specific key by prefixing it with the command="cmd" option.
authorized_keys man page explains this wonderful feature as follows:

Secure External Backup with ZFS Native Encryption
Let's improve our Simple and Secure External Backup solution I have published back in 2018. Back then, I was using rsync over SSH to pull backup data, and LUKS encryption as full disk encryption for the external drives. As we all know, transferring data with rsync can get horribly slow and blow up your I/O if you're transferring millions of small files. Also, LUKS encryption may be a bit low level and inflexible. What we want to accomplish: A performant and secure backup solution based on ZFS, using zfs send|recv for efficient data transfer, and ZFS native encryption to secure our external drives. So let's go ahead and built that thing from scratch on a fresh 2021 stack!

APFS Encryption Status
macOS offers us a super simple way to fully encrypt an APFS formatted external drive: Right-click on the volume in the Finder and choose the option "Encrypt". Carbon Copy Cloner (CCC) also recommends this in its KB article Enabling encryption on a volume that will not contain an installation of macOS.
But macOS is a bit too transparent on that task. It simply starts encrypting the volume without any feedback or progress bar (WTF?). Even Disk Utility just shows the volume as APFS (Encrypted) - as it would have already completed full volume encryption.
Page 2 of 5 • 29 Posts